Hey Beautiful! This site is reader-supported and we earn commissions if you purchase products from retailers after clicking on a link from our site.
In the past few months, YouTube has been overwhelmed with makeup blogs about how black spots have started appearing on both of these products. The obvious question was, “Can beauty sponges get mold?” The unfortunate answer is — yes. Your beloved makeup sponge can get these spots, and you can find yourself with the problem of Real Techniques sponge mold.
One of the essentials for any makeup user has to be a beauty sponge. It has a variety of uses, including foundation blending and cream contouring. In the past few years, there is one particular product that has been leading the market, and that is the Beautyblender®.
While people were thinking that its popularity would continue, an adequate substitute popped up in recent years. It is called the Real Techniques sponge.

This product is much cheaper than the Beautyblender®, and still seems to offer all that a beauty sponge should. Therefore, it all comes down to your personal preference. Also, it depends whether you are more interested in having two pieces of a reliable product or a single one that can wear out within weeks.
The black spots that you are seeing on your sponge aren’t mascara residue. On the contrary, this is mold or fungus that has developed over time. It usually starts in the form of green fuzzy rings and spreads as you continue to clean and store your beauty sponge improperly.
How do you get mold out of a sponge? That is something we will be discussing below. Before moving forward, we want to say that it does not matter what sponge you are using. As long as you are not taking good care of your beauty sponge, it will start developing mold and fungus.
Therefore, you may be putting your health at serious risk. To prevent that, we have researched the different methods of removing mold from beauty sponges.
Let’s take a look.
What Happens When You Use a Moldy Sponge?
The first thing to note is that mold and fungi on a makeup sponge are nothing but products of human error. Thus, you shouldn’t blame the manufacturer. This can appear on any product of this kind that is not stored or cleaned properly.
If you are not familiar with how to use these, we suggest you take a look at this article. The first question is what happens to your skin? If you decide to continue using the moldy sponge, then you shouldn’t expect anything good.
The whole container of concealer or foundation cream will be contaminated with mold and fungi because these products are kept closed and in dark/places, which is the ideal environment for mold and fungi spore growth.
As a consequence, your skin will be at an increased risk of fungal infections due to the fact that you will continue putting on that contaminated makeup with or without that moldy sponge.
Talking about the possible bad effects, it is quite clear that you shouldn’t take risks. You should learn how to remove mold from the sponge.
How to Properly Remove Mold from Sponges
Now that it is clear your sponge is prone to developing mold, fungi and bacteria, it is time to discuss a couple of effective methods to remove them.
Microwave
A common question is how to clean the Real Techniques sponge microwave method. Believe it or not, this is quite simple. The best thing about it is you can remove up to 99% of germs with just a couple of minutes of effort.
Still, be sure not to overheat the beauty sponge, as it may end up damaged. Then, it would be good for nothing other than a trash can. The process itself is a few, simple steps.
First and foremost, you should put the sponge in distilled water. Once you have done that, turn on the microwave and set it to high heat. Make sure that your beauty sponge is in the microwave for a maximum of 2 minutes, as anything above that will degrade the material.
Check whether this method will work with the Real Techniques sponge.
Vinegar
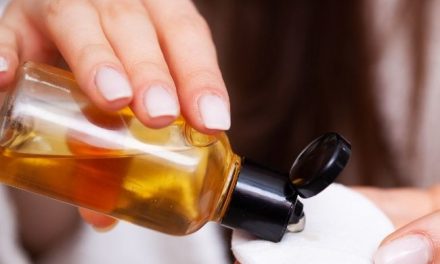
Another great method for getting rid of Real Techniques sponge mold is using apple cider vinegar. Yes, we understand that you are skeptical because of the strong smell. Believe us, it will go away after a couple of hours of proper storage.
Pour a full cup of full-strength vinegar into a bowl or jar and let your beauty sponge sit for around 5 minutes. While it may not remove all the bacteria, it certainly will do a great job of eliminating 97-98%.
Thus, the answer to the question of “Can I use a moldy beauty blender?” is yes. This is, of course, if you did your best to remove mold and bacteria using the aforementioned methods.
Also, if you are not planning to improve your storage game, then reusing your sponge or buying a new one has no point whatsoever.
How Do You Prevent Mold?
The first thing that you want to do is to stop storing your beauty sponge in a zipper storage bag. Instead, you should ensure that it is stored with proper ventilation. It shouldn’t be exposed to direct sunlight, as this may damage the sponge and contribute to fungal growth. Our personal favorite is a mesh bag.
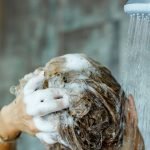
Not to forget, you should clean the sponge after every use with an antibacterial cleanser. Use the cleanser that either came with the product or one that you bought separately. Once you have done that, make sure that it dries out completely before you put it in the mesh bag. Only this way can you prevent the black and moldy patches.
How to Clean Sponges?
You probably know by now that it is moisture and improper storage that is responsible for your Real Techniques sponge mold or fungal growth on your other makeup sponge so you will need to put some extra effort into maintenance to avoid health risks, as well as save money.
The most important thing is that it is properly cleaned after each use. This way you will be preventing fossilized foundation. Additionally, any impurities that end up in the sponge will be completely removed.
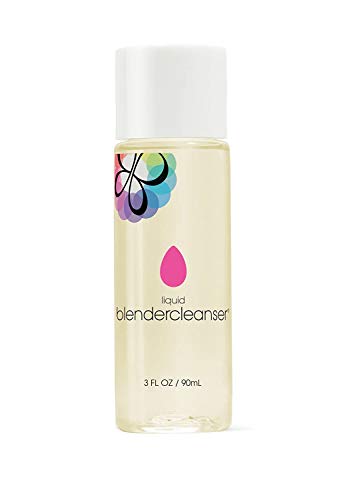
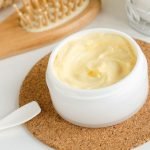
You can opt to go for a simple water/soap solution, but our personal recommendation is that you invest in a professional product. While a blendercleanser may be a bit pricey, it is worth every cent.
Once you have thoroughly cleaned it and squeezed out all the excess moisture, you should let it sit for 20-30 minutes.
How do dry out your makeup sponges? By placing it on a sanitized surface away from direct sunlight and allowing it to air dry. Once that is done, store it in the mesh bag until your next makeup session.
Conclusion
Real Techniques sponge mold and Beautyblender® black spots have become quite an issue. Thus, we felt we should discuss the issue and give you tips on proper maintenance. Remember that black patches on your makeup sponge never mean a good thing. In order to avoid trouble and health risks, follow our cleaning tips and stay on the safe side.


